


Added Features
Our client comes with several things the original game does not have, starting with being able to play it in Spanish. None of them are compulsory, but the four below get used every day and it is worth knowing they are there.
The game in Spanish
Section titled “The game in Spanish”At Ashenvale the client and the server were reworked to be multi-language (English / Spanish). The game is in English by default, but anyone can play it entirely in Spanish: the windows, the options, the Community and the server messages.
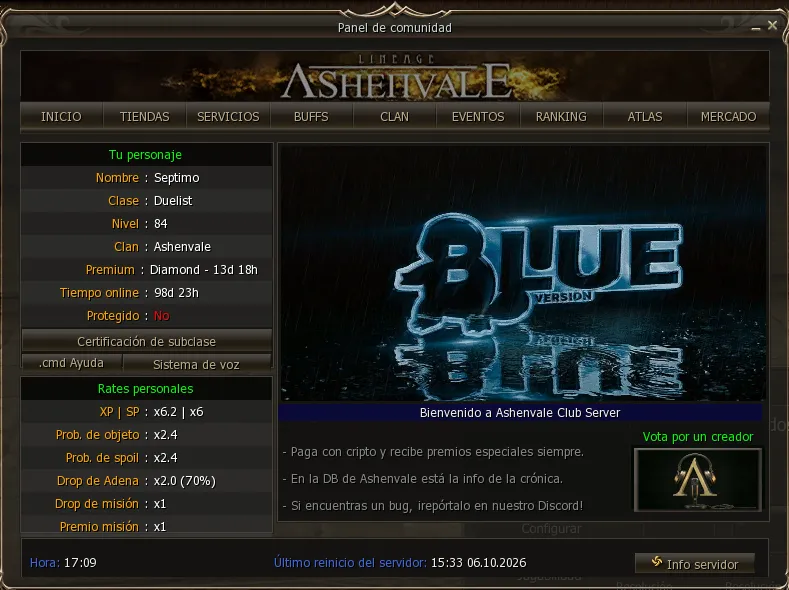
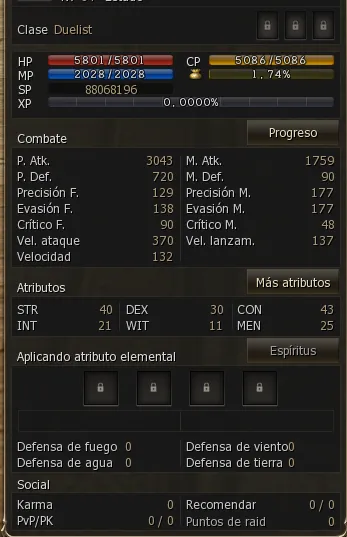
The language is not changed from inside the game: you choose it in the launcher before opening it, in Settings → Game Client → Game language or in the ☰ menu next to Play. The details are in Ashenvale Launcher. Careful: it is not the same as the launcher’s language, which only changes the launcher’s texts.
Moving and splitting the chat
Section titled “Moving and splitting the chat”The chat comes with a general channel and several tabs per channel (General, Trade, Party, Clan, Ally), plus the system message window above it. Out of the box the two sit together, bottom left.
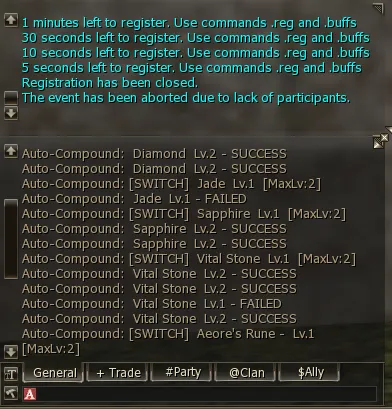
Both windows move freely around the screen and snap to each other like magnets when you bring them close, so you can keep them stuck together or send each one its own way.
And there is something even more useful: every tab can be split off. Pull one out and that channel becomes its own window, with its name on top, and it moves on its own.
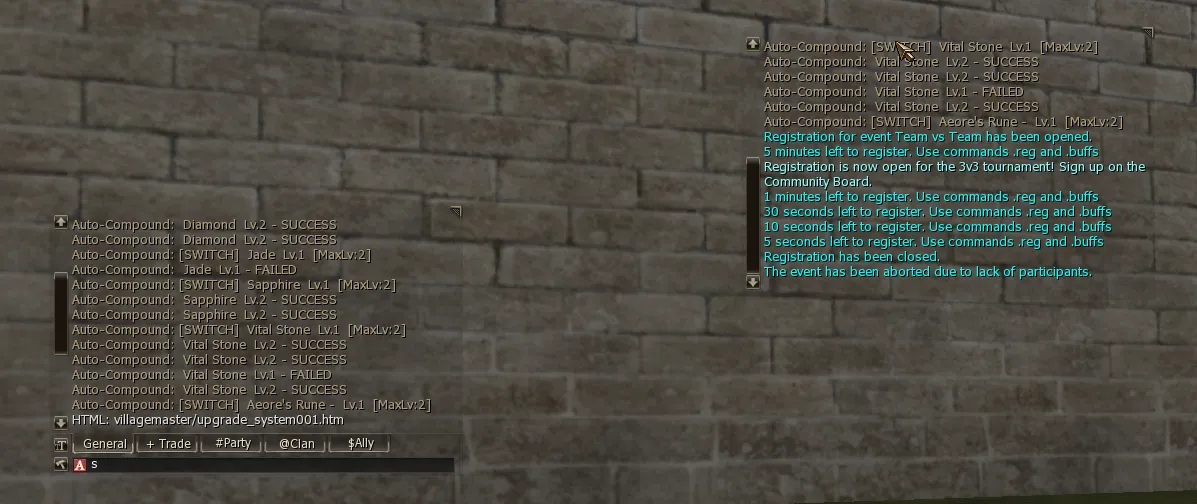
You can split off as many as you like, each one wherever you want it.
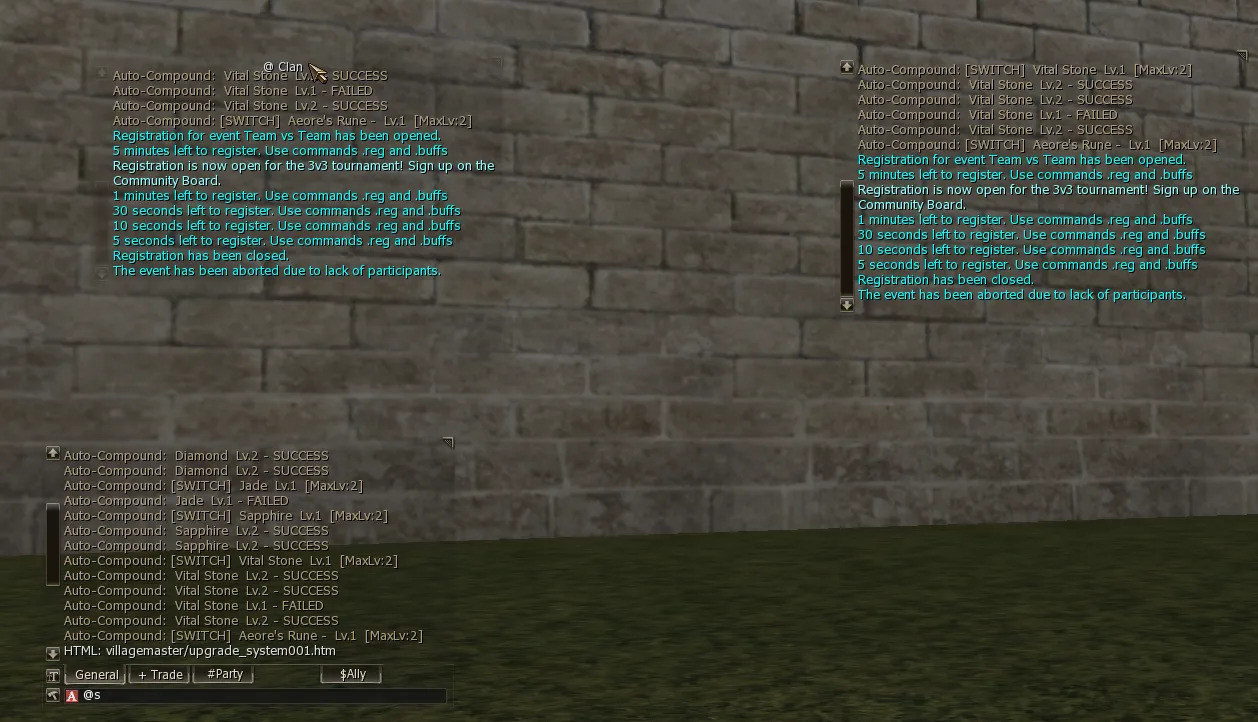
To dock it back into the group, drag it over the chat and drop it there: the tab returns to its row and everything is as it was.
What it is good for
Section titled “What it is good for”Combined with each window’s options — from the game settings menu you choose which channels go into which tab — you can build a layout to suit you, spread across areas of the screen, instead of reading everything stacked in one box.
A concrete example: during an event or PvP at the epics, keeping Ally and Clan split, each in its own corner. Clan orders on one side, alliance coordination on the other, and neither of them buried under general spam or system messages. What matters reads at a glance, without hunting for it.
Same when farming: keep the party chat in sight and push the rest off to one side.
And since the change is not permanent, you can have one layout for the event and go back to your usual one by dragging the windows home.
Adjustable shortcut bar
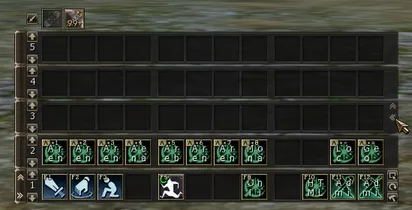
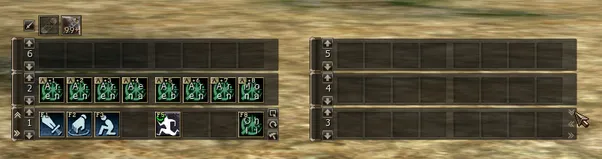
Section titled “Adjustable shortcut bar”The shortcut bar can be arranged in three ways: width, transparency and rows split into groups. Everything is saved on its own and comes back the same when you log in; only Alt+L (default position) resets it.
12, 8 or 4 slots wide
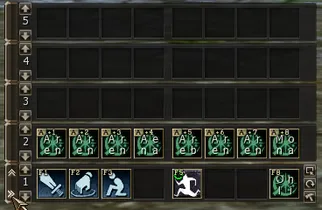
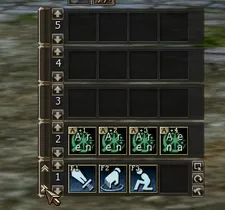
Section titled “12, 8 or 4 slots wide”The » button at the bottom left of the main row changes the width of the whole bar: 12 → 8 → 4 → 12. The slots left out are not lost, just hidden until you widen it again. In a split-off group, the width is changed per group with the « and » icons that show up when you hover its right column.
Transparency
Section titled “Transparency”The options button in the right column of the main row opens a panel below the bar with a slider from 25 % to 100 %: it dims the background and the slots of every row without touching the icons. Next to it is the lock, which blocks changes to the skills and items in the slots, as always.
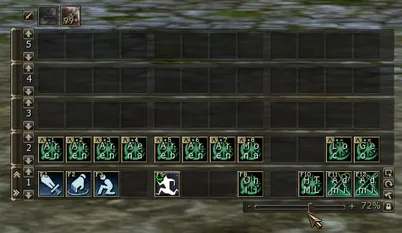
Splitting and joining rows
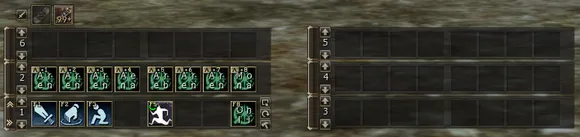
Section titled “Splitting and joining rows”Hover the right column of a row and an ↑ arrow appears: it splits that row, together with the ones above it, into a separate group you can drag from any of its rows. You can make several groups and leave them wherever you like.
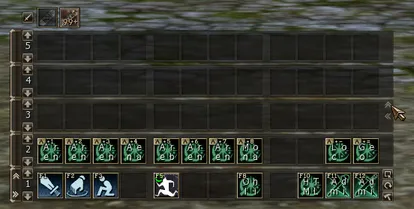
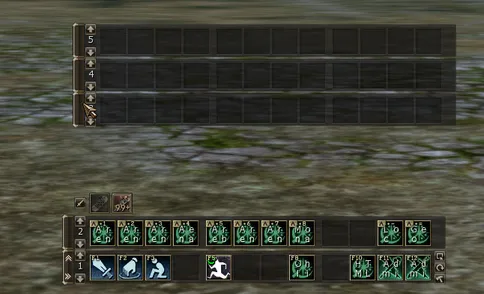
To join them back: the group’s ↓ arrow sends it back on top of the main bar, or drag it until it rests on another row and it snaps on its own, like a magnet. New rows from the + always come out on top of the main group, and so do the shot mini-shortcuts.
Item search
Section titled “Item search”The inventory and the warehouse have a search box. It opens with the magnifying glass above the scrollbar and unfolds a text field: as you type, the grid shows only what matches.
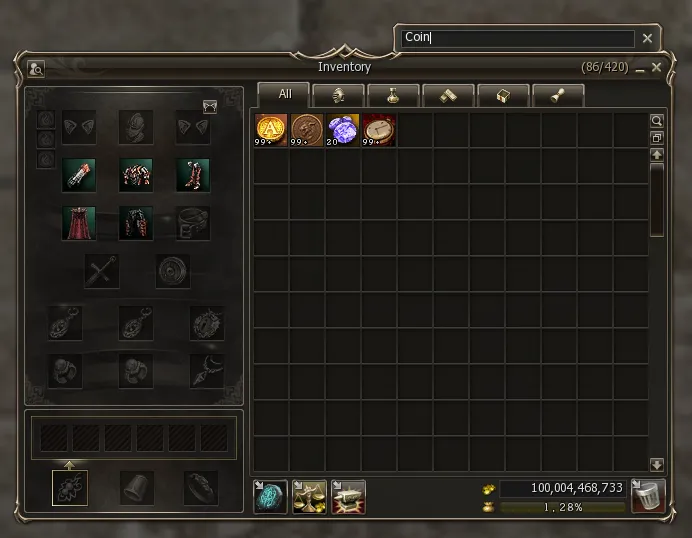
Filtered items can be used, equipped and dragged just the same as if you had pulled them out of the pile.
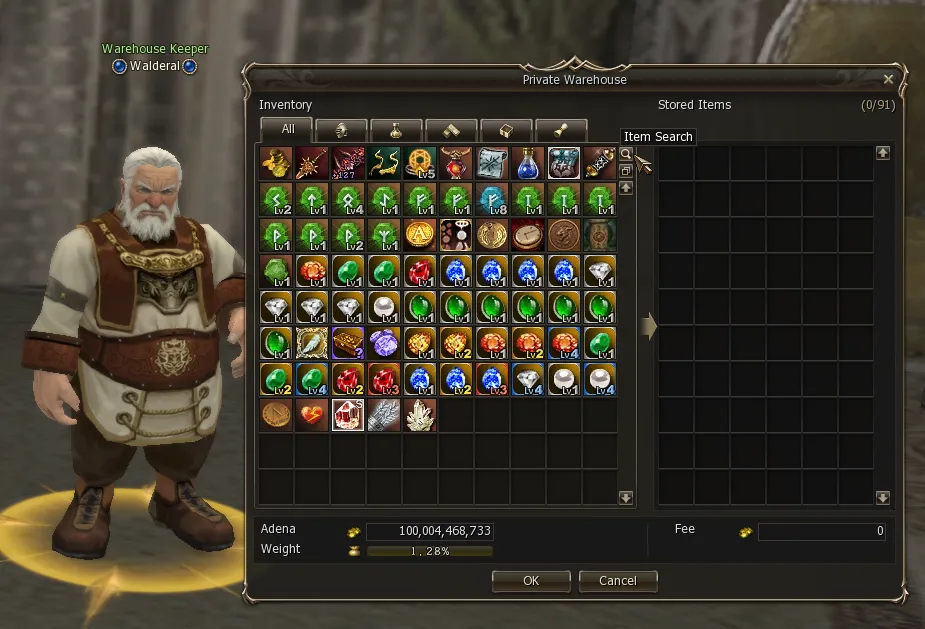
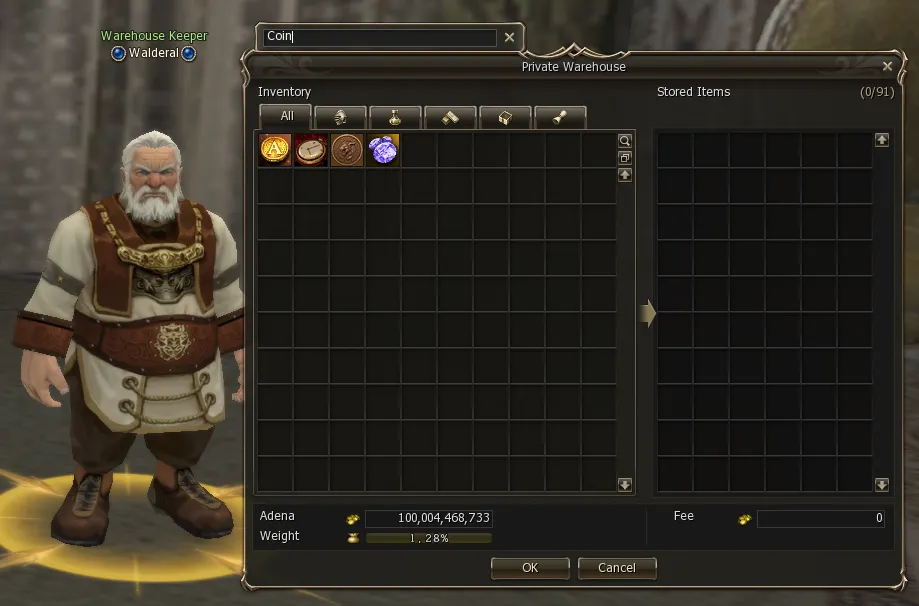
In the warehouse it is the same search, with the Item Search button in the same position.
Three things so you do not end up fighting it:
- It matches the start of a word, not any fragment. Typing
sbrings up Soulshot and Greater Spirit Ore, but not Crystal. It looks at every word in the name, because half the list starts with “Greater” or “Lesser”. It ignores upper and lower case. - It filters within the tab you are on. Standing in Equipment, searching
soulshotreturns nothing. - You cannot reorder inside the result. The search draws a separate grid and never touches the real one, so the order you arranged by hand stays intact.
Closing the box — with the X or by pressing the magnifying glass again — or clearing what you typed brings the whole list back.
Trying an item on before buying it
Section titled “Trying an item on before buying it”The accessory and cloak shops have a Preview button: you select the item and your character puts it on so you can see it before spending.
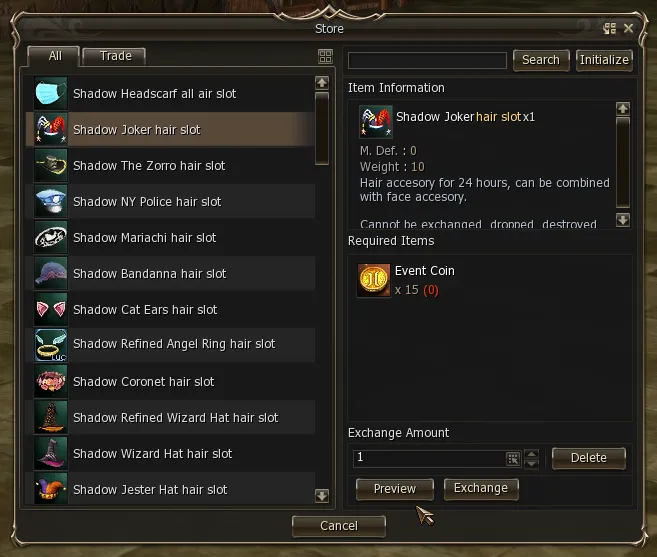
How it works:
- It lasts 30 seconds and then your own gear comes back on its own.
- No item enters your inventory: it is purely visual, there is nothing that can be lost or sold.
- It only enables when the selected item is equippable, and you have to wait 2 seconds between one try-on and the next.
- You can combine several at once in different slots — cloak, hair and face at the same time — and each one runs its own timer.
- While the try-on lasts you cannot move: your character stands still so you can see yourself. You can move again when the last active try-on ends.
NPC information
Section titled “NPC information”Shift+click stayed for attacking
Section titled “Shift+click stayed for attacking”At Ashenvale, shift + click on a mob is for attacking it without your character walking over to it: you stay where you are and attack from there.
That is why it does not open the stats and drop window the way it does on other servers. It is deliberate: that information moved to the ? button on the target window, which leaves shift + click free for the one thing that matters while you are fighting.
The information window
Section titled “The information window”When you target an NPC or a mob, a ? button appears in the little window with its name — View NPC stats and drops.
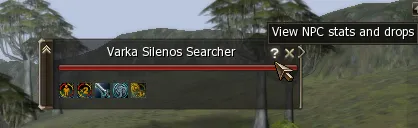
That button opens the NPC Information window, with three tabs.
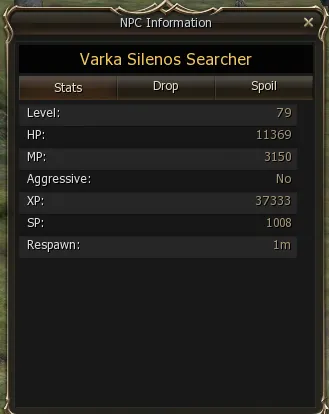
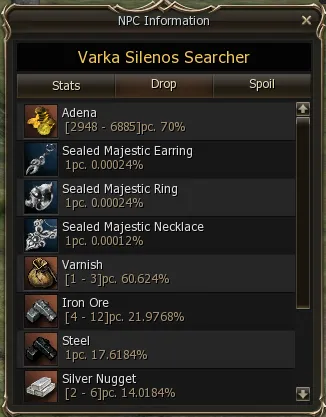
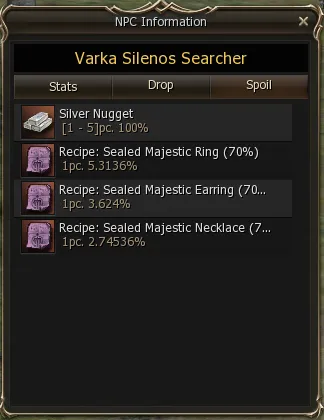
It updates itself with your target
Section titled “It updates itself with your target”The good thing about this window is that you do not have to reopen it for every mob. If you leave it open:
- Changing target shows the new NPC on its own, with its information up to date.
- It stays on the tab you were on: if you were looking at Drop, the next mob opens on Drop too.
- If you close it, it does not reopen on its own when you change target. It only comes back when you press
?.
It is useful for walking a zone comparing what is worth farming without touching anything but your target.
Favorites and search in the Teleport window
Section titled “Favorites and search in the Teleport window”The gatekeeper’s Teleport window has two additions of ours: a search box and favorites.
Opening it with Alt+F
Section titled “Opening it with Alt+F”The Teleport window opens and closes with Alt+F, without going through the panel button. With Enter Chat enabled (Options → Shortcut), F on its own is enough.
The key is changed in Menu → Options → Shortcut, on the Open/Close Teleport row.
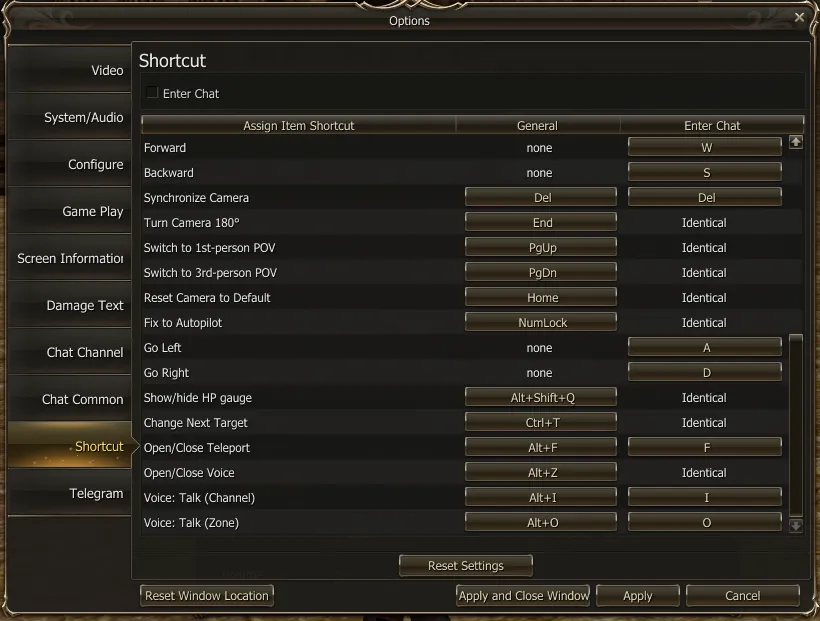
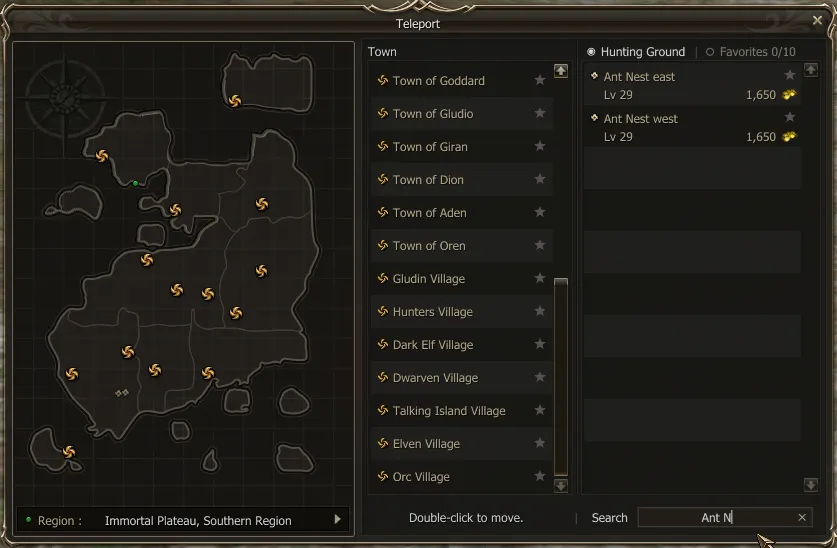
Search
Section titled “Search”At the bottom of the window there is a Search box. As you type, the right column lists every destination of every town whose name contains that text, priced from the town you are in, and the map marks only those points. Double click teleports as always; the x clears the search.
Favorites
Section titled “Favorites”Every town and every hunting ground has a star next to it: one click marks it, another clears it. The right column has two tabs: Hunting Ground, the usual list, and Favorites, with what you marked across all towns, priced from where you are. Double click teleports, and the window remembers which tab you closed it on. Favorites are saved per character, on your PC.
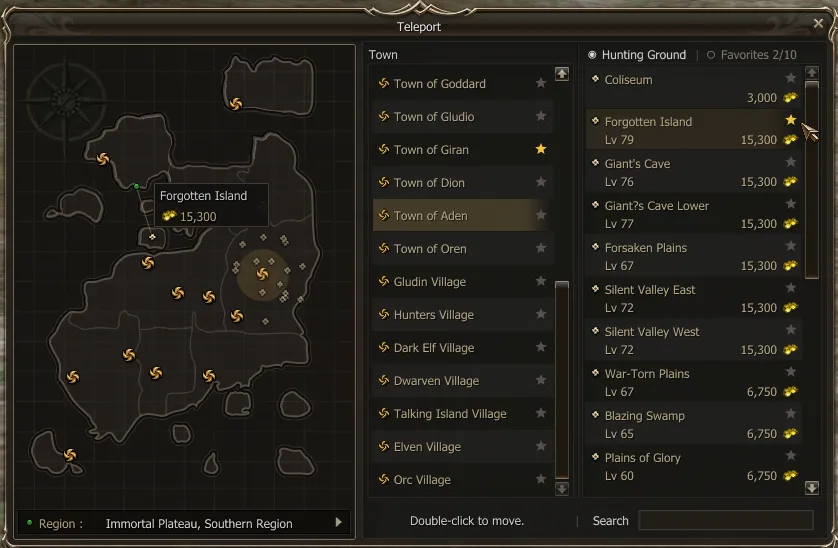
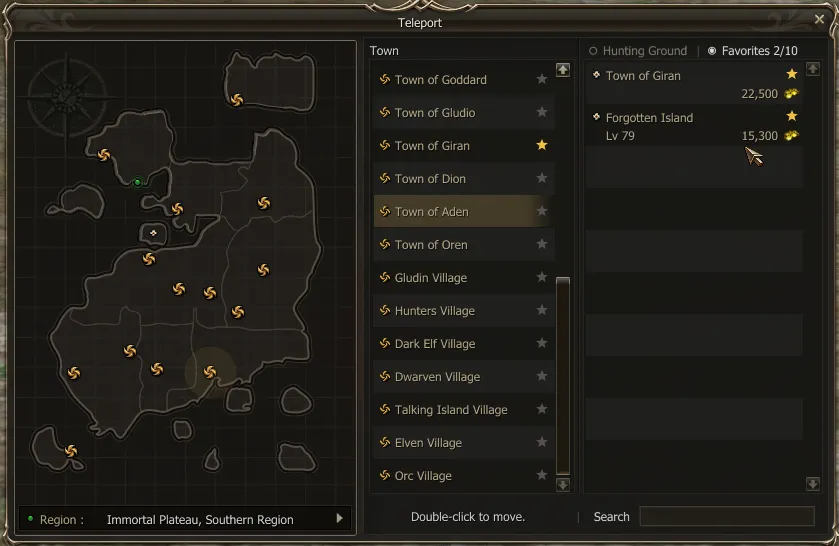
Favorites are a benefit of the Gold and Diamond premium accounts: up to 10 marked destinations. Without premium the window looks as it always did, with no stars or tab. If the premium expires the list is not lost: it comes back when you renew.
Character Status: More Stats and Progress
Section titled “Character Status: More Stats and Progress”The character status window (Alt+T) has two buttons of ours: More Stats and Progress.
More Stats
Section titled “More Stats”Opens all of the character’s additional stats on the side, the ones the game does not show: what you used to check in the Community, now without leaving the status window.
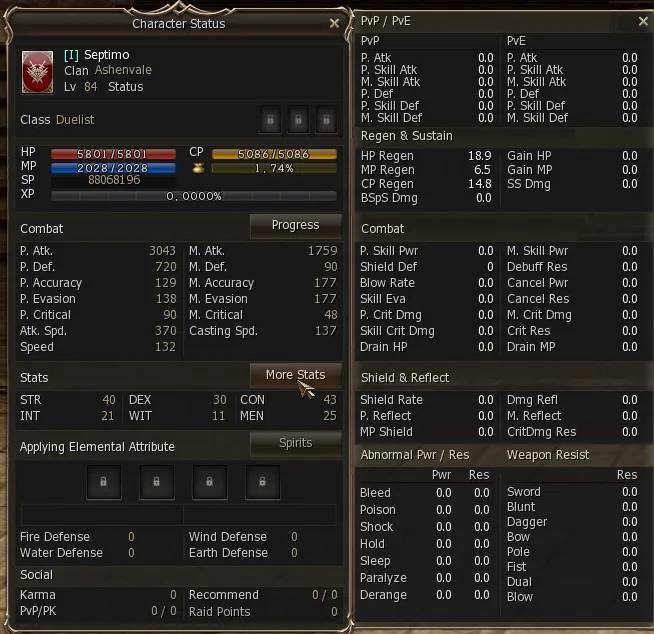
They are grouped by block:
- PvP / PvE: the extra damage and defense against players and against mobs (P. Atk, physical and magic skills, P. Def).
- Regen & Sustain: HP, MP and CP regeneration, and what you gain per hit.
- Combat: skill power, criticals, blow, cancel, debuff resistance and HP and MP drain.
- Shield & Reflect: shield block and damage reflection.
- Abnormal Pwr / Res: power and resistance for each status (Bleed, Poison, Shock, Hold, Sleep, Paralyze, Derange).
- Weapon Resist: resistance against each weapon type.
Progress: locking your experience
Section titled “Progress: locking your experience”Progress opens Character Progress: it is the experience lock, to stay at a level without going up (for example, for an event or a level bracket).
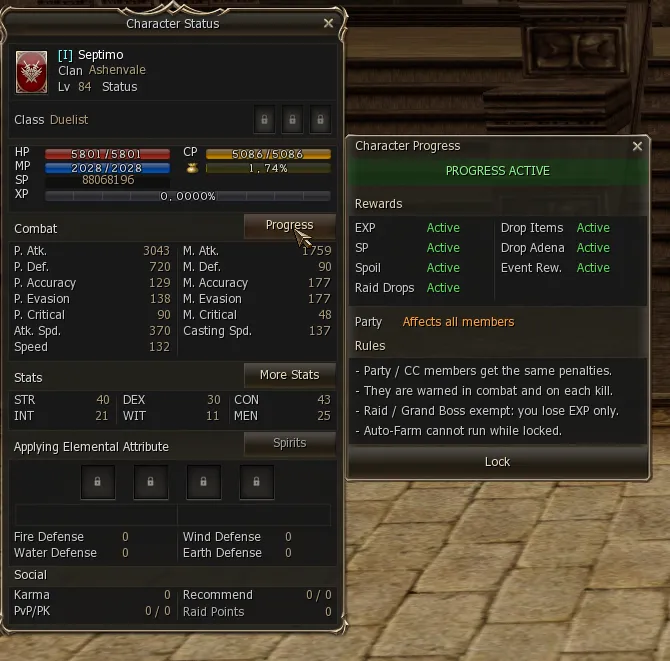
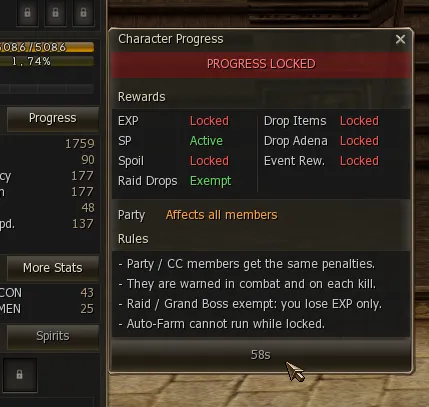
- The Lock button locks it and the same button unlocks it. Between one change and the next there is a 60-second cooldown, shown as a countdown on the button.
- Rewards shows what is cut off while locked: whatever appears in red (Locked) you do not get; whatever stays green (Active or Exempt) you do. Currently EXP, Spoil, Drop Items, Drop Adena and Event Rewards are locked; SP stays active and raid drops are exempt.
- Party: it affects the whole party. If a member has their progress locked, the party and the Command Channel get the same penalties, and they are warned in combat and on every kill.
- Raid Bosses and Grand Bosses are exempt: against them you only lose the EXP.
- With your progress locked, the mobs you kill do not advance quests, and Auto Farm cannot be used.
Party ring
Section titled “Party ring”The leader can put a ring on the ground under every party member, to spot them at a glance in the middle of an event, a PvP or a crowded area. Only the party sees it: for every other player it does not exist.
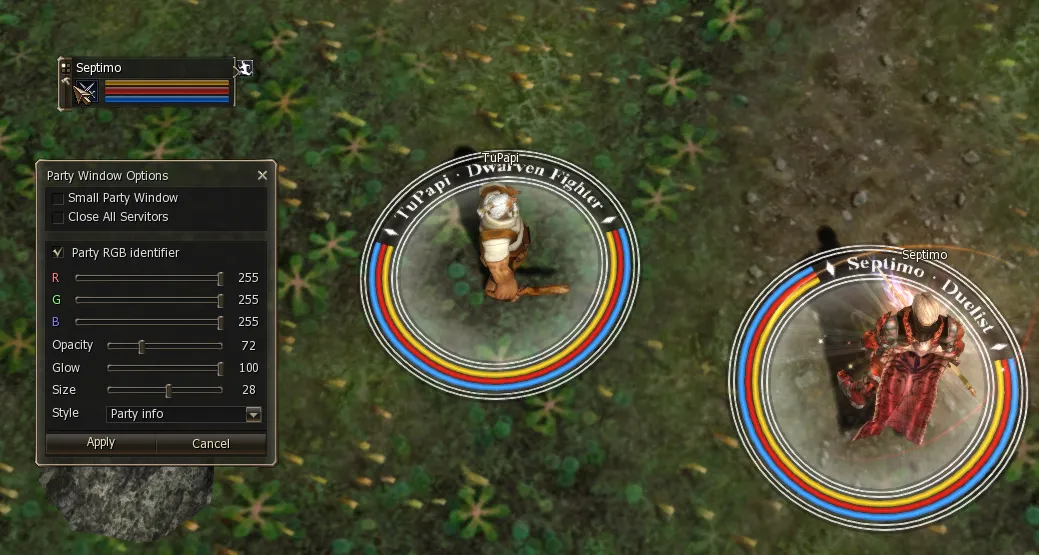
It is set up from Party Window Options (the options button on the Party window), by checking Party RGB identifier. Only the leader can change it:
- R, G, B: the color.
- Opacity: how transparent it is drawn.
- Glow: how sharp or blurred the edge looks.
- Size: the ring’s size.
- Style: Border only, Party, Ashenvale, Triangles or Party info, which also shows the member’s name and class and their CP, HP and MP bars around the ring.
While it is being adjusted, the whole party sees a live preview. Apply confirms it; Cancel, the X or leaving it 5 seconds without confirming go back to the previous ring. The setting stays with the party even if the leader changes.
Ashenvale graphics options
Section titled “Ashenvale graphics options”In Menu → Options → Video we added options to make the game look better (contrast, sharpness, saturation, color tone, anisotropic filter, distant textures) and others to take load off your graphics card in crowded areas (which dressme, private stores and effects you see of other players). They are explained one by one, together with the game’s usual ones, in Graphics options.
Telegram from Options
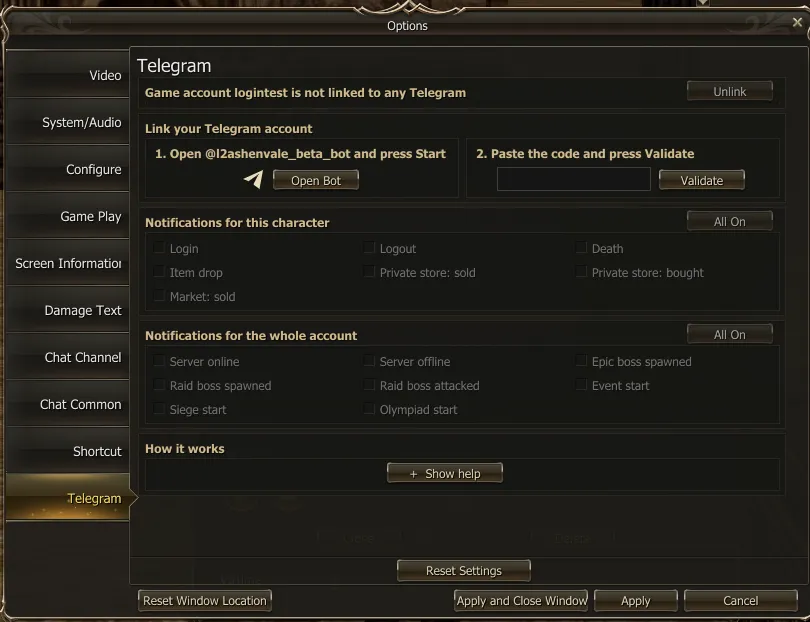
Section titled “Telegram from Options”The Telegram bot notifications can also be managed from Menu → Options → Telegram, without going into the Community: link the account, choose which alerts arrive and unlink it. It is explained in Telegram Bot.
Ashenvale Voice
Section titled “Ashenvale Voice”The client comes with built-in voice chat, no separate programs needed. It is explained on its own page: Ashenvale Voice.